ESP32-DEVKITC-WROOM
Overview
ESP32-DEVKITC-WROOM is a series of low cost, low power system on a chip microcontrollers with integrated Wi-Fi & dual-mode Bluetooth. The ESP32 series employs a Tensilica Xtensa LX6 microprocessor in both dual-core and single-core variations. ESP32-WROOM is created and developed by Espressif Systems, a Shanghai-based Chinese company, and is manufactured by TSMC using their 40nm process. [1]
The features include the following:
Dual core Xtensa microprocessor (LX6), running at 160 or 240MHz
520KB of SRAM
802.11b/g/n/e/i
Bluetooth v4.2 BR/EDR and BLE
Various peripherals:
12-bit ADC with up to 18 channels
2x 8-bit DACs
10x touch sensors
Temperature sensor
4x SPI
2x I2S
2x I2C
3x UART
SD/SDIO/MMC host
Slave (SDIO/SPI)
Ethernet MAC
CAN bus 2.0
IR (RX/TX)
Motor PWM
LED PWM with up to 16 channels
Hall effect sensor
Cryptographic hardware acceleration (RNG, ECC, RSA, SHA-2, AES)
5uA deep sleep current
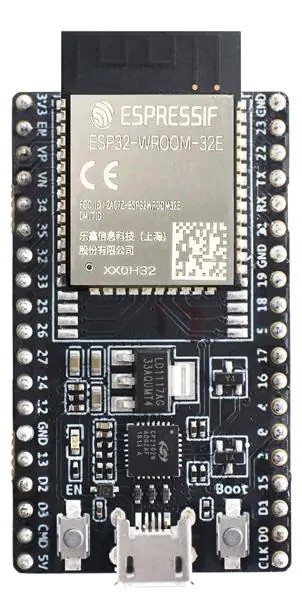
ESP32-DevKitC-WROOM-32D DK
Asymmetric Multiprocessing (AMP)
ESP32-DEVKITC-WROOM allows 2 different applications to be executed in ESP32 SoC. Due to its dual-core architecture, each core can be enabled to execute customized tasks in stand-alone mode and/or exchanging data over OpenAMP framework. See IPC Samples folder as code reference.
Supported Features
Current Zephyr’s ESP32-WROOM board supports the following features:
Interface |
Controller |
Driver/Component |
|---|---|---|
UART |
on-chip |
serial port |
GPIO |
on-chip |
gpio |
PINMUX |
on-chip |
pinmux |
USB-JTAG |
on-chip |
hardware interface |
SPI Master |
on-chip |
spi |
Timers |
on-chip |
counter |
Watchdog |
on-chip |
watchdog |
TRNG |
on-chip |
entropy |
LEDC |
on-chip |
pwm |
MCPWM |
on-chip |
pwm |
PCNT |
on-chip |
qdec |
SPI DMA |
on-chip |
spi |
TWAI |
on-chip |
can |
ADC |
on-chip |
adc |
DAC |
on-chip |
dac |
Wi-Fi |
on-chip |
|
Bluetooth |
on-chip |
System requirements
Prerequisites
Espressif HAL requires WiFi and Bluetooth binary blobs in order work. Run the command below to retrieve those files.
west blobs fetch hal_espressif
Note
It is recommended running the command above after west update.
Building & Flashing
Simple boot
The board could be loaded using the single binary image, without 2nd stage bootloader. It is the default option when building the application without additional configuration.
Note
Simple boot does not provide any security features nor OTA updates.
MCUboot bootloader
User may choose to use MCUboot bootloader instead. In that case the bootloader must be build (and flash) at least once.
There are two options to be used when building an application:
Sysbuild
Manual build
Note
User can select the MCUboot bootloader by adding the following line
to the board default configuration file.
`
CONFIG_BOOTLOADER_MCUBOOT=y
`
Sysbuild
The sysbuild makes possible to build and flash all necessary images needed to bootstrap the board with the ESP32 SoC.
To build the sample application using sysbuild use the command:
west build -b esp_wrover_kit --sysbuild samples/hello_world
By default, the ESP32 sysbuild creates bootloader (MCUboot) and application images. But it can be configured to create other kind of images.
Build directory structure created by sysbuild is different from traditional Zephyr build. Output is structured by the domain subdirectories:
build/
├── hello_world
│   └── zephyr
│       ├── zephyr.elf
│       └── zephyr.bin
├── mcuboot
│    └── zephyr
│       ├── zephyr.elf
│       └── zephyr.bin
└── domains.yaml
Note
With --sysbuild option the bootloader will be re-build and re-flash
every time the pristine build is used.
For more information about the system build please read the Sysbuild (System build) documentation.
Manual build
During the development cycle, it is intended to build & flash as quickly possible. For that reason, images can be build one at a time using traditional build.
The instructions following are relevant for both manual build and sysbuild. The only difference is the structure of the build directory.
Note
Remember that bootloader (MCUboot) needs to be flash at least once.
Build and flash applications as usual (see Building an Application and Run an Application for more details).
# From the root of the zephyr repository
west build -b esp32_devkitc_wroom/esp32/procpu samples/hello_world
The usual flash target will work with the esp32_devkitc_wroom board
configuration. Here is an example for the Hello World
application.
# From the root of the zephyr repository
west build -b esp32_devkitc_wroom/esp32/procpu samples/hello_world
west flash
Open the serial monitor using the following command:
west espressif monitor
After the board has automatically reset and booted, you should see the following message in the monitor:
***** Booting Zephyr OS vx.x.x-xxx-gxxxxxxxxxxxx *****
Hello World! esp32_devkitc_wroom
Debugging
ESP32-DEVKITC-WROOM support on OpenOCD is available upstream as of version 0.12.0. Download and install OpenOCD from OpenOCD.
On the ESP-WROOM-32 DevKitC board, the JTAG pins are not run to a standard connector (e.g. ARM 20-pin) and need to be manually connected to the external programmer (e.g. a Flyswatter2):
ESP32 pin |
JTAG pin |
|---|---|
3V3 |
VTRef |
EN |
nTRST |
IO14 |
TMS |
IO12 |
TDI |
GND |
GND |
IO13 |
TCK |
IO15 |
TDO |
Further documentation can be obtained from the SoC vendor in JTAG debugging for ESP32.
Here is an example for building the Hello World application.
# From the root of the zephyr repository
west build -b esp32_devkitc_wroom/esp32/procpu samples/hello_world
west flash
You can debug an application in the usual way. Here is an example for the Hello World application.
# From the root of the zephyr repository
west build -b esp32_devkitc_wroom/esp32/procpu samples/hello_world
west debug
Note on Debugging with GDB Stub
GDB stub is enabled on ESP32.
When adding breakpoints, please use hardware breakpoints with command
hbreak. Commandbreakuses software breakpoints which requires modifying memory content to insert break/trap instructions. This does not work as the code is on flash which cannot be randomly accessed for modification.