HelTec Wireless Stick Lite (V3)
Overview
HelTec Wireless Stick Lite (V3) is a development board with Wi-Fi, Bluetooth and LoRa support. It is designed and produced by HelTec Automation(TM). [1]
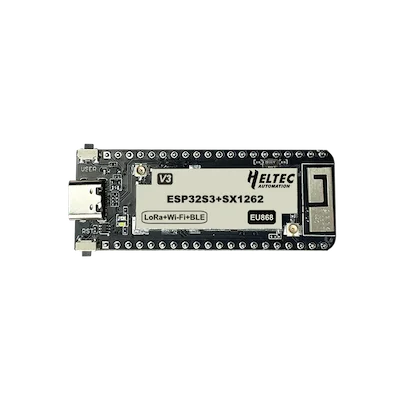
HelTec Wireless Stick Lite (V3) (Credit: Chengdu HelTec Automation Technology Co., Ltd.)
Hardware
The main hardware features are:
ESP32-S3FN8 low-power MCU-based SoC (dual-core Xtensa® 32-bit LX7 microprocessor, five stage pipeline rack Structure, main frequency up to 240 MHz).
Semtech SX1262 LoRa node chip
Type-C USB interface with a complete voltage regulator, ESD protection, short circuit protection, RF shielding, and other protection measures (note: you need an USB-A to USB-C cable if you want to power-up the board from USB).
Onboard SH1.25-2 battery interface, integrated lithium battery management system (charge and discharge management, overcharge protection, battery power detection, USB / battery power automatic switching).
Integrated WiFi and Bluetooth interfaces with 2.4GHz metal spring antenna and reserved IPEX (U.FL) interface for LoRa use.
Integrated CP2102 USB to serial port chip, convenient for program downloading, debugging information printing.
Good RF circuit design and low-power design.
Supported Features
LoRa via SPI
UART0 (USB Serial via CP2102)
UART1
I2C
CAN (optional, need to enable)
PWM LED
User Switch / Button
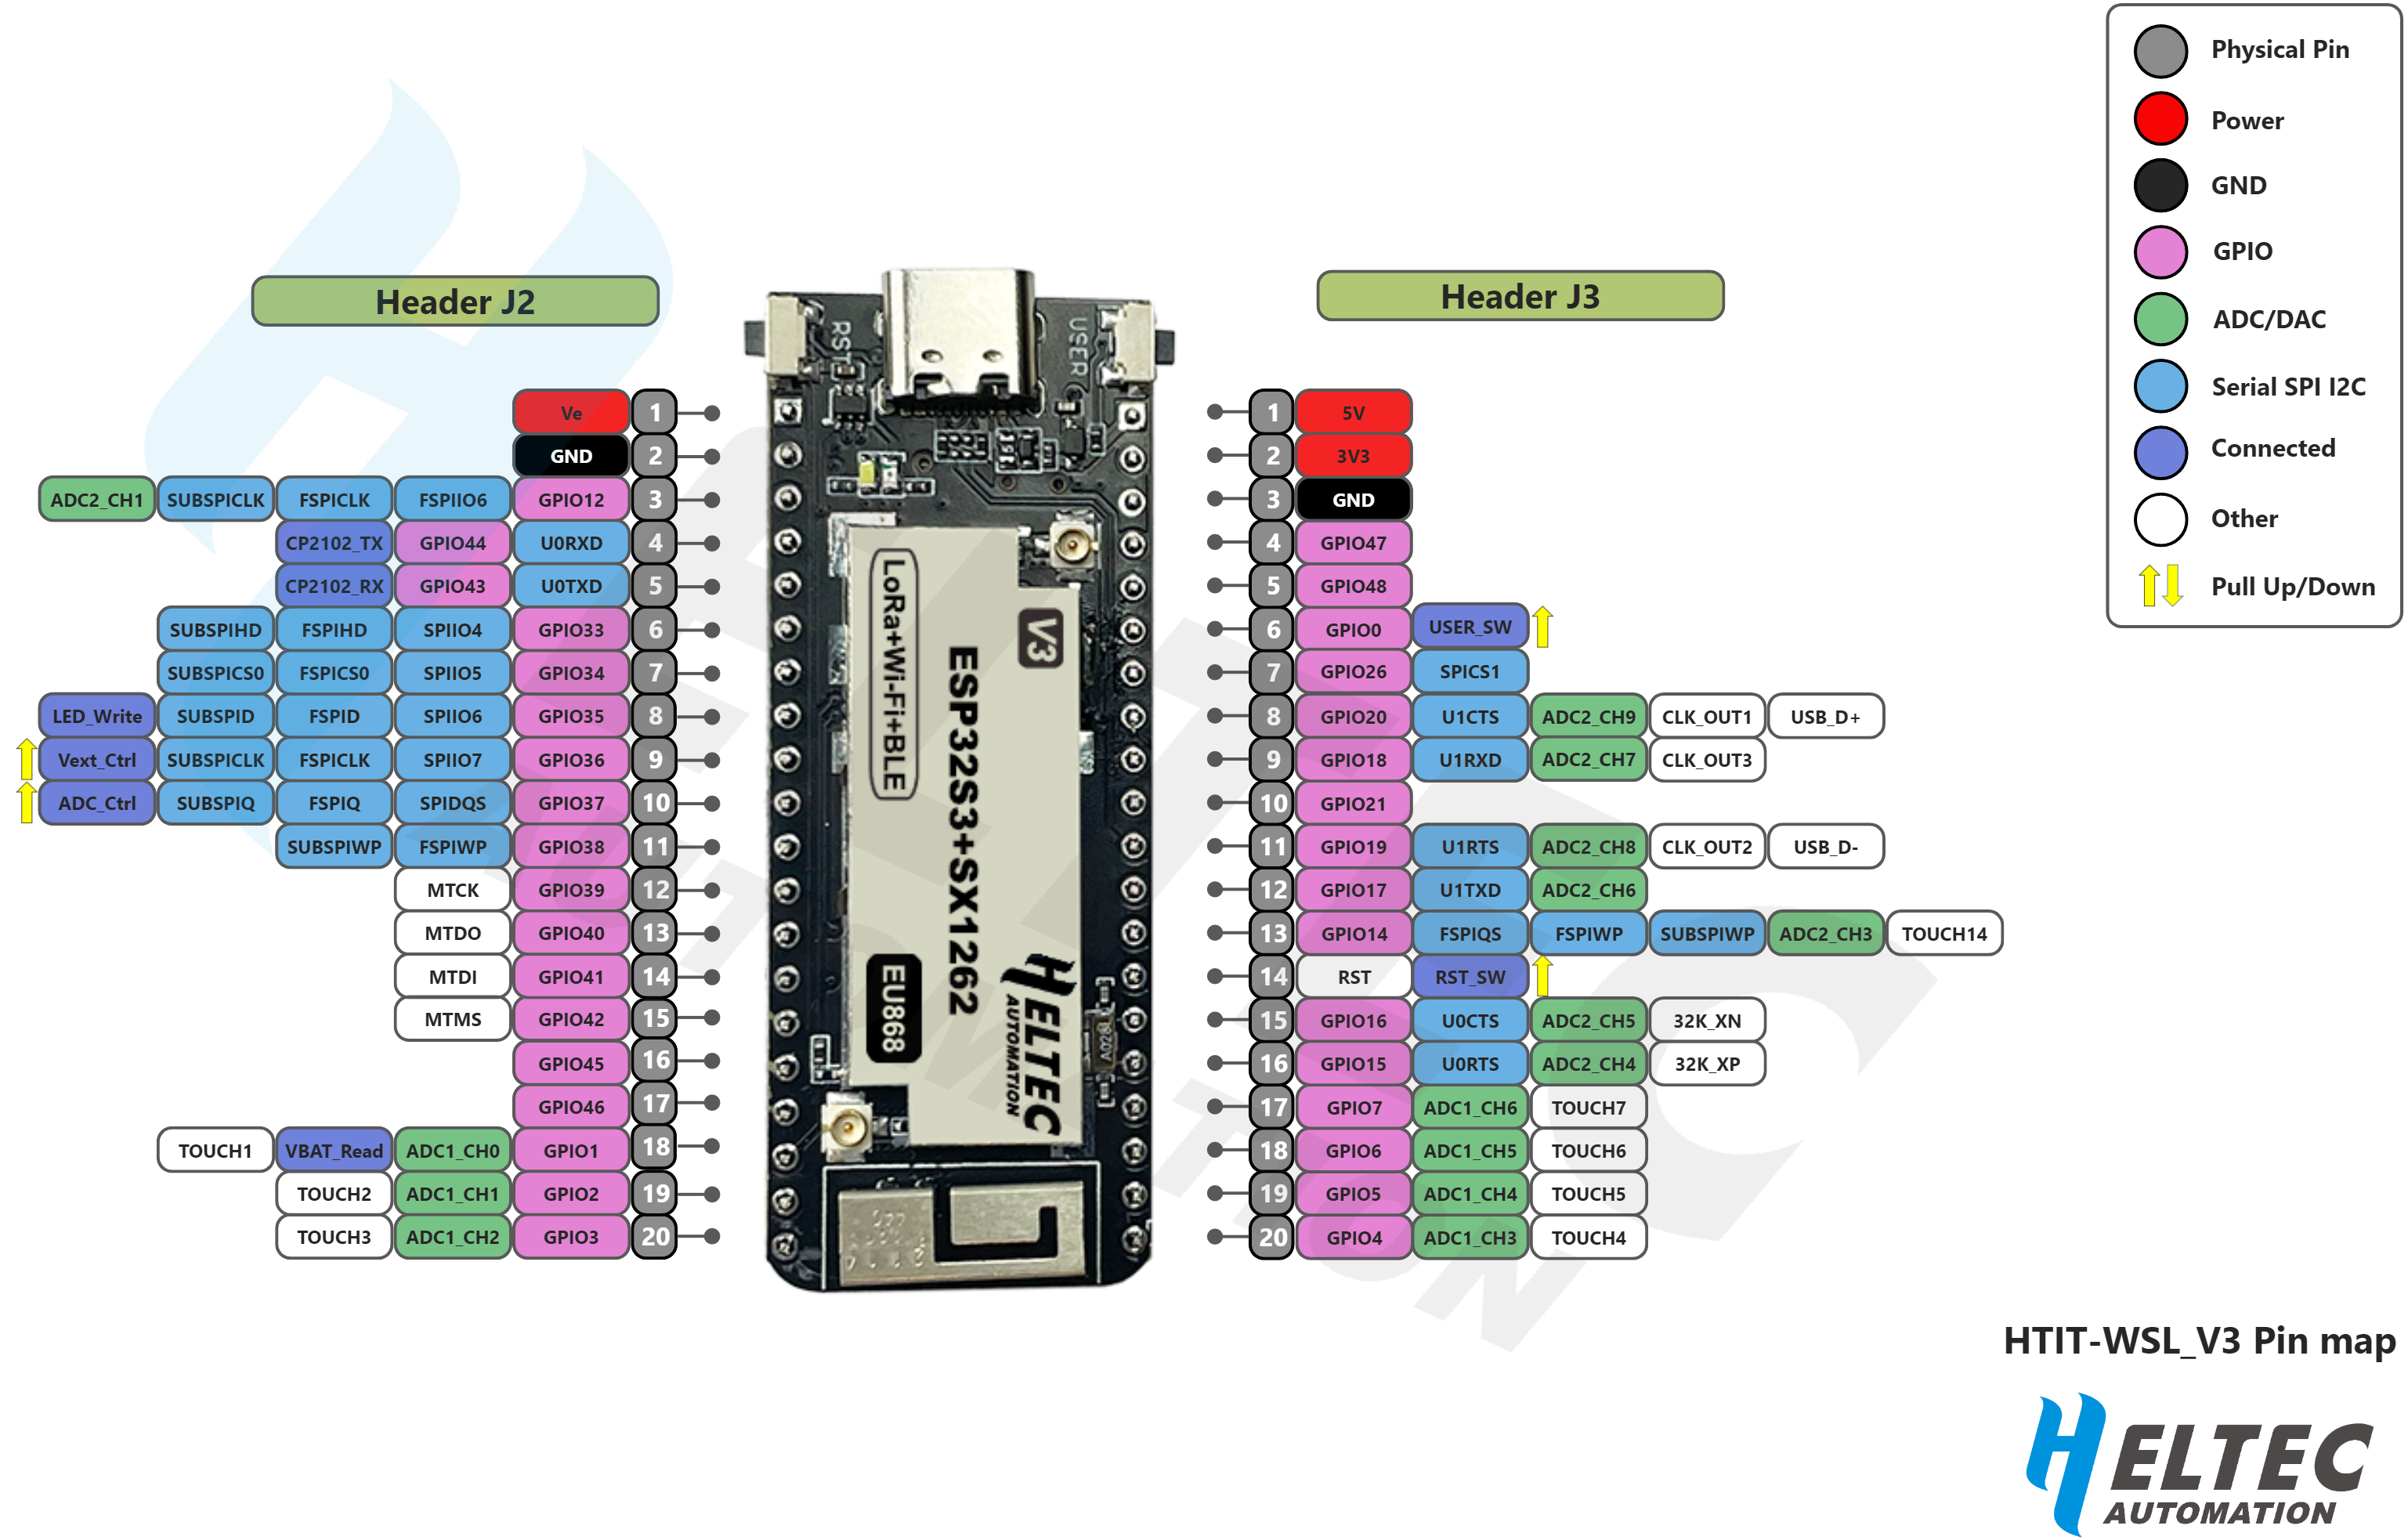
Connections and IOs
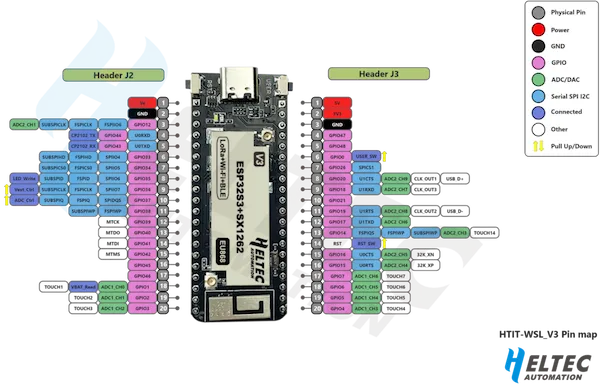
Pinout (Credit: Chengdu HelTec Automation Technology Co., Ltd.)
Header |
Function |
Description |
|---|---|---|
J2.1 |
Ve |
|
J2.2 |
GND |
|
J2.3 |
||
J2.4 |
U0RXD |
Zephyr Console+Shell |
J2.5 |
U0TXD |
Zephyr Console+Shell |
J2.6 |
||
J2.7 |
||
J2.8 |
GPIO35 |
PWM LED Control |
J2.9 |
GPIO36 |
Vext Control |
J2.10 |
GPIO37 |
ADC Control |
J2.11 |
||
J2.12 |
GPIO39 |
|
J2.13 |
GPIO40 |
|
J2.14 |
GPIO41 |
|
J2.15 |
GPIO42 |
|
J2.16 |
GPIO45 |
|
J2.17 |
GPIO46 |
|
J2.18 |
ADC1_CH0 |
Battery Voltage Measurement |
J2.19 |
||
J2.20 |
||
J3.1 |
5V |
|
J3.2 |
3V3 |
|
J3.3 |
GND |
|
J3.4 |
GPIO47 |
|
J3.5 |
GPIO48 |
|
J3.6 |
GPIO0 |
User Switch |
J3.7 |
||
J3.8 |
||
J3.9 |
U1RXD |
UART 1 |
J3.10 |
GPIO21 |
|
J3.11 |
||
J3.12 |
U1TXD |
UART 1 |
J3.13 |
||
J3.14 |
NC |
Reset Switch |
J3.15 |
||
J3.16 |
||
J3.17 |
||
J3.18 |
||
J3.19 |
TWAI_TX |
CAN (optional) |
J3.20 |
TWAI_RX |
CAN (optional) |
System requirements
Prerequisites
Espressif HAL requires WiFi and Bluetooth binary blobs in order work. Run the command below to retrieve those files.
west blobs fetch hal_espressif
Note
It is recommended running the command above after west update.
Programming and Debugging
Simple boot
The board could be loaded using the single binary image, without 2nd stage bootloader. It is the default option when building the application without additional configuration.
Note
Simple boot does not provide any security features nor OTA updates.
MCUboot bootloader
User may choose to use MCUboot bootloader instead. In that case the bootloader must be build (and flash) at least once.
There are two options to be used when building an application:
Sysbuild
Manual build
Note
User can select the MCUboot bootloader by adding the following line
to the board default configuration file.
`
CONFIG_BOOTLOADER_MCUBOOT=y
`
Sysbuild
The sysbuild makes possible to build and flash all necessary images needed to bootstrap the board with the EPS32-S3 SoC.
To build the sample application using sysbuild use the command:
west build -b heltec_wireless_stick_lite_v3 --sysbuild samples/hello_world
By default, the ESP32S3 sysbuild creates bootloader (MCUboot) and application images. But it can be configured to create other kind of images.
Build directory structure created by sysbuild is different from traditional Zephyr build. Output is structured by the domain subdirectories:
build/
├── hello_world
│   └── zephyr
│       ├── zephyr.elf
│       └── zephyr.bin
├── mcuboot
│    └── zephyr
│       ├── zephyr.elf
│       └── zephyr.bin
└── domains.yaml
Note
With --sysbuild option the bootloader will be re-build and re-flash
every time the pristine build is used.
For more information about the system build please read the Sysbuild (System build) documentation.
Manual build
During the development cycle, it is intended to build & flash as quickly possible. For that reason, images can be build one at a time using traditional build.
The instructions following are relevant for both manual build and sysbuild. The only difference is the structure of the build directory.
Note
Remember that bootloader (MCUboot) needs to be flash at least once.
Build and flash applications as usual (see Building an Application and Run an Application for more details).
# From the root of the zephyr repository
west build -b heltec_wireless_stick_lite_v3/esp32s3/procpu samples/hello_world
The usual flash target will work with the heltec_wireless_stick_lite_v3 board
configuration. Here is an example for the Hello World
application.
# From the root of the zephyr repository
west build -b heltec_wireless_stick_lite_v3/esp32s3/procpu samples/hello_world
west flash
Open the serial monitor using the following command:
west espressif monitor
After the board has automatically reset and booted, you should see the following message in the monitor:
***** Booting Zephyr OS vx.x.x-xxx-gxxxxxxxxxxxx *****
Hello World! heltec_wireless_stick_lite_v3
Debugging
As with much custom hardware, the ESP32S3 modules require patches to OpenOCD that are not upstreamed yet. Espressif maintains their own fork of the project. The custom OpenOCD can be obtained at OpenOCD ESP32
The Zephyr SDK uses a bundled version of OpenOCD by default. You can overwrite that behavior by adding the
-DOPENOCD=<path/to/bin/openocd> -DOPENOCD_DEFAULT_PATH=<path/to/openocd/share/openocd/scripts>
parameter when building.
Here is an example for building the Hello World application.
# From the root of the zephyr repository
west build -b heltec_wireless_stick_lite_v3/esp32s3/procpu samples/hello_world -- -DOPENOCD=<path/to/bin/openocd> -DOPENOCD_DEFAULT_PATH=<path/to/openocd/share/openocd/scripts>
west flash
You can debug an application in the usual way. Here is an example for the Hello World application.
# From the root of the zephyr repository
west build -b heltec_wireless_stick_lite_v3/esp32s3/procpu samples/hello_world
west debug