CTHINGS.CO Connectivity Card nRF52840
Overview
The Connectivity Card nRF52840 enables BLE and IEEE 802.15.4 connectivity over mPCIe or M.2 using USB port with on-board nRF52840 SoC.
This board has following features:
CLOCK
FLASH
GPIO
MPU
NVIC
RADIO (Bluetooth Low Energy and 802.15.4)
RTC
USB
WDT

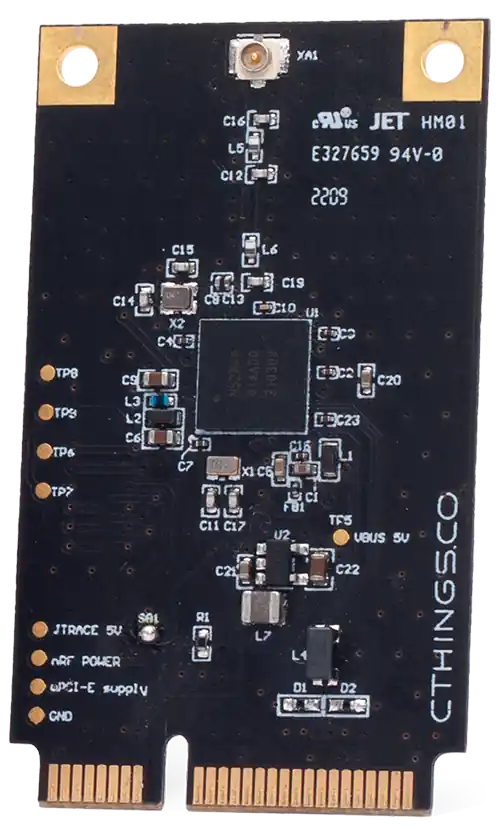
ctcc/nrf52840 mPCie board

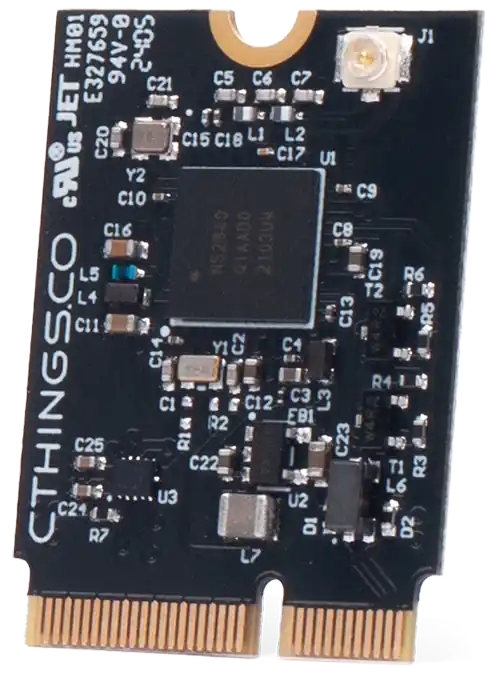
ctcc/nrf52840 M.2 board
More information about the board can be found at the ctcc_nrf52840 Website [1] and for SoC information: Nordic Semiconductor Infocenter [2].
Hardware
The ctcc/nrf52840 board target has one external oscillator of the 32.768 kHz.
Supported Features
The ctcc/nrf52840 board target supports the following
hardware features:
Interface |
Controller |
Driver/Component |
|---|---|---|
CLOCK |
on-chip |
clock_control |
FLASH |
on-chip |
flash |
GPIO |
on-chip |
gpio |
MPU |
on-chip |
arch/arm |
NVIC |
on-chip |
arch/arm |
RADIO |
on-chip |
Bluetooth, ieee802154 |
RTC |
on-chip |
system clock |
USB |
on-chip |
usb |
WDT |
on-chip |
watchdog |
Connections and IOs
LED
Note that board does not have on-board LEDs, however it exposes LED signals on mPCIe/M.2 pins.
LED1 = P0.23
LED2 = P0.22
Programming and Debugging
Applications for the ctcc/nrf52840 board target can be
built in the usual way (see Building an Application for more details).
Flashing
The board supports the following programming options:
Using an external debug probe
Using MCUboot with DFU support
Option 1: Using an External Debug Probe
Connectivity Card can be programmed using an external debug probe (Segger J-Link) by connecting to on-board SWD test pads.
For Segger J-Link debug probes, follow the instructions in the Nordic nRF5x Segger J-Link page to install and configure all the necessary software. Further information can be found in Flashing.
Then build and flash applications as usual (see Building an Application and Run an Application for more details).
Here is an example for the Console over USB CDC ACM application which prints out logs on emulated USB port.
# From the root of the zephyr repository
west build -b ctcc/nrf52840 samples/subsys/usb/console
west flash
Debugging
The ctcc/nrf52840 board target does not have an on-board J-Link debug IC, however
instructions from the Nordic nRF5x Segger J-Link page also apply to this board,
with the additional step of connecting an external debugger.
Option 2: Using MCUboot with DFU support
It is also possible to use the MCUboot bootloader with DFU support to flash Zephyr applications. You need to flash MCUboot with DFU support and fill in slot0 with some application one-time using Option 1. Then you can re-flash an application using DFU utility by loading images to slot1. Note, it’s not possible to have only MCUboot and load directly software to slot0 due to DFU implementation in Zephyr, which for present slot0 and slot1 in flash map, it assumes only slot1 partition as writeable.
Install dfu-util first and make sure MCUboot’s imgtool is
available for signing your binary for MCUboot as described on Signing Binaries.
Next, do the one-time setup to flash MCUboot with DFU support. We’ll assume you’ve cloned the MCUboot [3] as a submodule when initializing Zephyr repositories using West (Zephyr’s meta-tool) tool.
Compile MCUboot as a Zephyr application with DFU support.
west build -b ctcc/nrf52840 -d build/mcuboot mcuboot/boot/zephyr -- -DCONFIG_BOOT_USB_DFU_WAIT=y
Flash it onto the board as described in Option 1.
Flash other Zephyr application to fill in slot0 e.g:
west build -b ctcc/nrf52840 -d build/dfu samples/subsys/usb/dfu -- -DCONFIG_BOOTLOADER_MCUBOOT=y -DCONFIG_MCUBOOT_SIGNATURE_KEY_FILE=\"path/to/mcuboot/boot/root-rsa-2048.pem\"
You can now flash a Zephyr application to the board using DFU util. As an example we’ll use the Console over USB CDC ACM sample.
# From the root of the zephyr repository
west build -b ctcc/nrf52840 samples/subsys/usb/console -- -DCONFIG_BOOTLOADER_MCUBOOT=y -DCONFIG_MCUBOOT_SIGNATURE_KEY_FILE=\"path/to/mcuboot/boot/root-rsa-2048.pem\"
west flash
Note
In all examples it is assumed to use default root-rsa-2048.pem file from mcuboot/boot
directory. Providing certificate in build args produces signed binary automatically.
Do not use this certificate in your production firmware!
Plug in
ctcc/nrf52840card to mPCIe/M.2 slot or use mPCIe/M.2 adapter to USB and plug such adapter to USB port.You should see
NordicSemiconductor MCUBOOTorNordicSemiconductor Zephyr DFU sample(if you flashed dfu sample to slot0) device once plugging it into host USB port. You can check that on Linux system by enteringlsusbcommand.To check if DFU device is visible you can enter
sudo dfu-util -lcommand. Once the device is visible you can flash Zephyr image using DFU util:sudo dfu-util --alt 1 --download build/zephyr/zephyr.signed.bin