IDE for Zephyr (VS Code extension)
IDE for Zephyr is a Visual Studio Code (VS Code) extension for Zephyr RTOS development. It supports host tool management, west workspace setup, SDK management, project creation, build/flash, and debugging.
Key features
Integrate with Cortex-Debug for ST-Link, J-Link, OpenOCD, Black Magic Probe, and other probes via the built-in
zephyr-ide-cortexandzephyr-ide-westdebugger types that auto-resolve ELF, GDB, and runner pathsIntegrate with clangd or C/C++ for IntelliSense
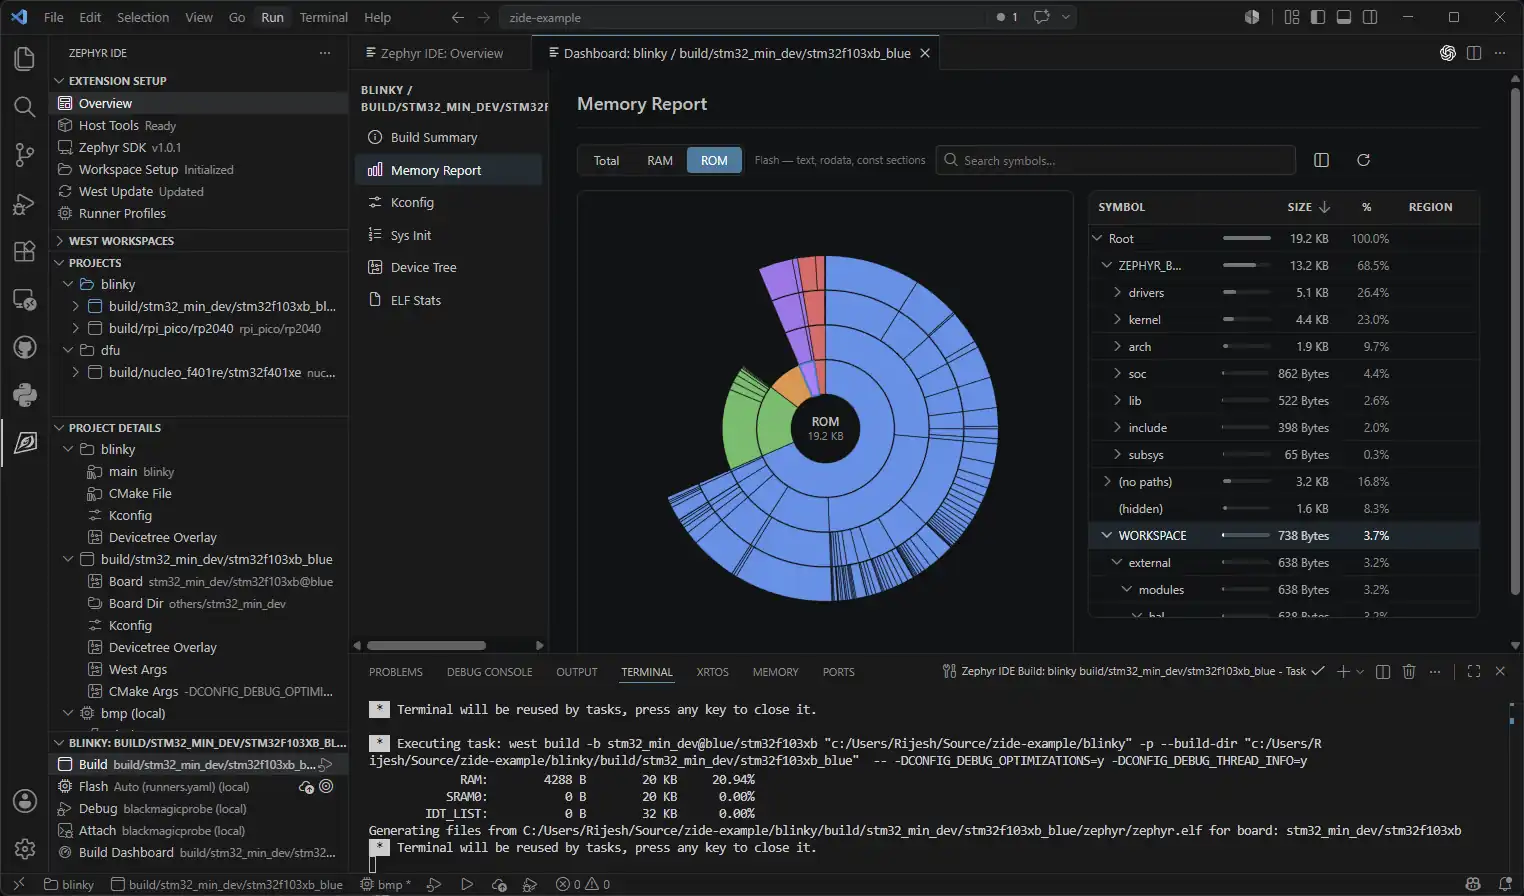
Explore memory usage, Kconfig, and devicetree from the Build Dashboard; view ROM and RAM as a sunburst chart without leaving VS Code
Edit Kconfig options interactively with the built-in editor
Add, run, and reconfigure Twister tests from the project panel
Install native host tools (CMake, Python 3, Ninja, DTC, GCC, etc.) automatically on Linux, macOS, and Windows
Install and manage Zephyr SDK versions and per-architecture toolchains
Add projects from existing applications or Zephyr samples, with multiple builds and per-build board and configuration overrides
Store project configuration in a version-controllable
.vscode/zephyr-ide.json, which can specify SDKs, packages, and blobs
Compatibility
Windows
Linux
macOS
Getting started
Install the extension
Install IDE for Zephyr from the VS Code Marketplace or the Open VSX Registry.
An extension pack bundling Cortex-Debug, C/C++, Serial Monitor, Devicetree LSP, and CMake support is also available on the VS Code Marketplace (Extension Pack) and the Open VSX Registry (Extension Pack).
Open the Overview Page and Install Host Tools
Click the Host Tools card. The extension verifies that the required build dependencies (CMake, Python 3, Ninja, DTC, GCC, etc.) are on the PATH and can install any missing tools automatically.
Configure a West workspace
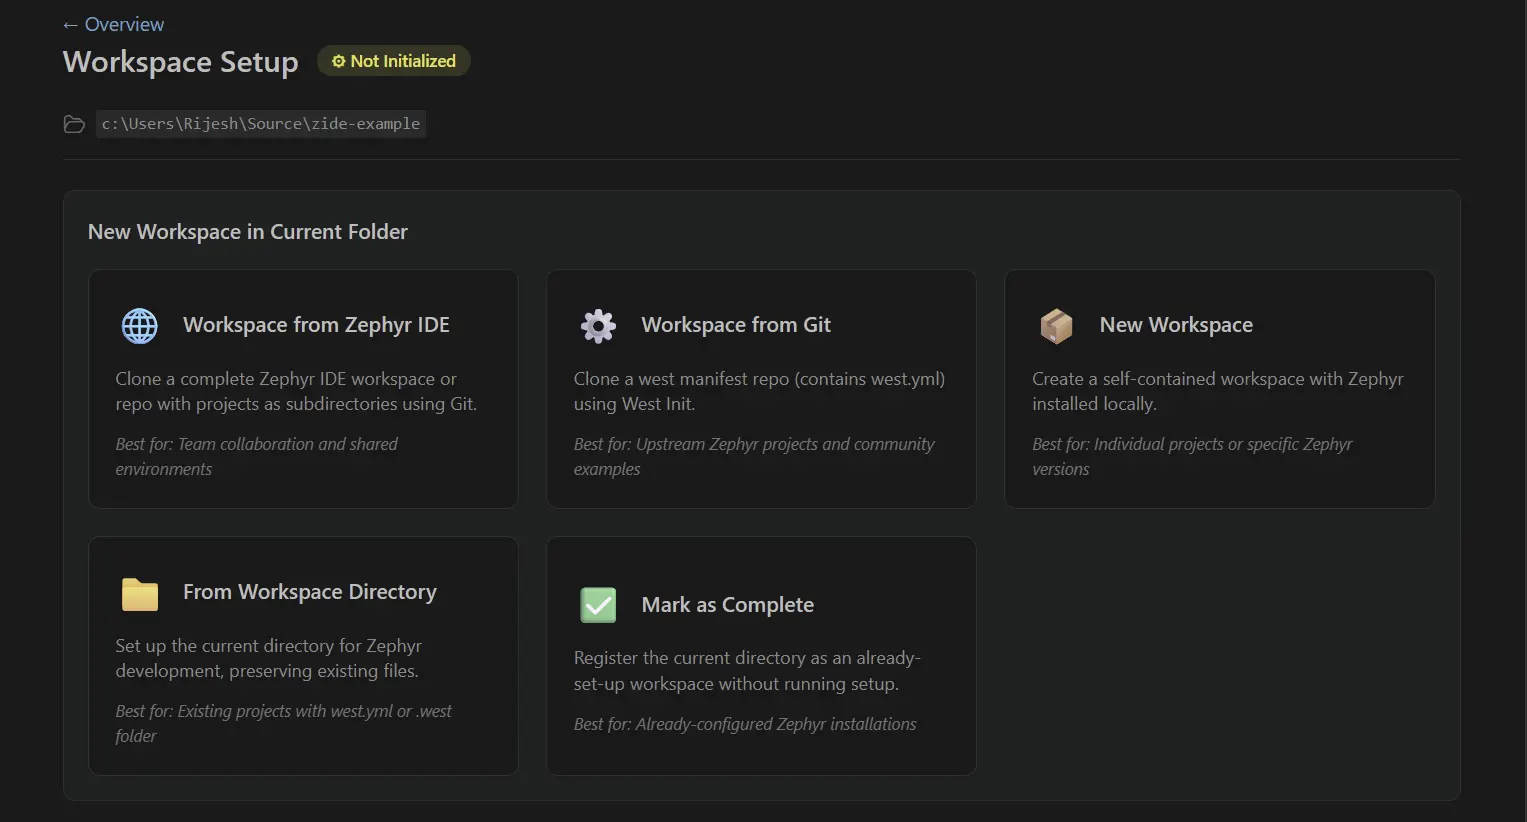
Click the Workspace card and choose a setup method:
IDE for Zephyr Workspace from Git — clone a repository that already contains a pre-configured IDE for Zephyr workspace.
West Workspace from Git — clone an existing west-based Zephyr repository.
Standard Workspace — create a fresh workspace with a Python virtual environment, west installation, and Zephyr repository initialization.
Open Current Directory — adopt an existing
.westfolder or link to an external Zephyr installation viaZEPHYR_BASE.
This step also prompts you to install a Zephyr SDK if needed. You can manage SDKs later from the Zephyr SDK card on the Overview page.
Add a project and a build
In the Project panel, click Add Project to add an existing application or copy a Zephyr sample as a starting point.
After adding a project, click Add Build to create a build configuration. Select the target board and, optionally, a runner profile. Each project can have multiple builds targeting different boards or configurations.
Build and flash the application
Use the status bar buttons or the Project Build panel to build, flash, or run a pristine build. Build output is shown in the integrated terminal.
Configure and run a debug session
IDE for Zephyr ships a built-in
zephyr-ide-westdebugger type that readsrunners.yamlfrom the active build and translates it into a Cortex-Debug session automatically. No.vscode/launch.jsonentry is required to get started. Thezephyr-ide-westprovider accepts the arguments you would pass towest debugserver, while thezephyr-ide-cortexprovider accepts the arguments you would pass tocortex-debugdirectly. You can also set up your own launch configuration and bind it to a build. The extension provides commands that can be resolved on launch.To add a launch configuration manually, use the minimal form:
{
  "name": "Zephyr IDE: Debug",
  "type": "zephyr-ide-west",
  "request": "launch"
}
The built-in provider selects the runner from
runners.yaml, resolves the ELF and GDB paths, and forwards the session to Cortex-Debug.
Useful links
Explore the Extension repository
Read the Full documentation
Try the Sample project