FVP BaseR AEMv8-R
Overview
This board configuration uses Armv8-R AEM FVP [1] to emulate a generic Armv8-R [2] hardware platform supporting both 32-bit (AArch32) and 64-bit (AArch64) architectures.
Fixed Virtual Platforms (FVP) are complete simulations of an Arm system, including processor, memory and peripherals. These are set out in a “programmer’s view”, which gives you a comprehensive model on which to build and test your software.
The Armv8-R AEM FVP is a free of charge Armv8-R Fixed Virtual Platform. It supports the latest Armv8-R feature set. Please refer to FVP documentation page [3] for more details about FVP.
To Run the Fixed Virtual Platform simulation tool you must download “Armv8-R AEM FVP” from Arm developer [1] (This might require the user to register) and install it on your host PC.
The current minimum required version of “Armv8-R AEM FVP” is 11.16.16.
Hardware
Supported Features
The fvp_baser_aemv8r board supports the hardware features listed below.
- on-chip / on-board
- Feature integrated in the SoC / present on the board.
- 2 / 2
-
Number of instances that are enabled / disabled.
Click on the label to see the first instance of this feature in the board/SoC DTS files. -
vnd,foo -
Compatible string for the Devicetree binding matching the feature.
Click on the link to view the binding documentation.
fvp_baser_aemv8r/fvp_aemv8r_aarch32 target
On-target memory for this board target: 128 MiB of RAM, 64 MiB of Flash.
Type |
Location |
Description |
Compatible |
|---|---|---|---|
CPU |
on-chip |
ARM Cortex-R82 CPU4 |
|
Clock control |
on-chip |
Generic fixed-rate clock provider1 |
|
Ethernet |
on-chip |
SMSC (now Microchip) LAN91C111 Ethernet controller1 |
|
on-chip |
SMSC (now Microchip) LAN91C111 MDIO Driver node1 |
||
on-chip |
Generic MII PHY1 |
||
Interrupt controller |
on-chip |
ARM Generic Interrupt Controller v31 |
|
MTD |
on-board |
Flash node1 |
|
Power management CPU operations |
on-board |
Power State Coordination Interface (PSCI) version 0.21 |
|
Serial controller |
on-chip |
||
Timer |
on-chip |
per-core ARM architected timer1 |
fvp_baser_aemv8r/fvp_aemv8r_aarch32/smp target
On-target memory for this board target: 128 MiB of RAM, 64 MiB of Flash.
Type |
Location |
Description |
Compatible |
|---|---|---|---|
CPU |
on-chip |
ARM Cortex-R82 CPU4 |
|
Clock control |
on-chip |
Generic fixed-rate clock provider1 |
|
Ethernet |
on-chip |
SMSC (now Microchip) LAN91C111 Ethernet controller1 |
|
on-chip |
SMSC (now Microchip) LAN91C111 MDIO Driver node1 |
||
on-chip |
Generic MII PHY1 |
||
Interrupt controller |
on-chip |
ARM Generic Interrupt Controller v31 |
|
MTD |
on-board |
Flash node1 |
|
Power management CPU operations |
on-board |
Power State Coordination Interface (PSCI) version 0.21 |
|
Serial controller |
on-chip |
||
Timer |
on-chip |
per-core ARM architected timer1 |
fvp_baser_aemv8r/fvp_aemv8r_aarch64 target
On-target memory for this board target: 128 MiB of RAM, 64 MiB of Flash.
Type |
Location |
Description |
Compatible |
|---|---|---|---|
CPU |
on-chip |
ARM Cortex-R82 CPU4 |
|
Clock control |
on-chip |
Generic fixed-rate clock provider1 |
|
Ethernet |
on-chip |
SMSC (now Microchip) LAN91C111 Ethernet controller1 |
|
on-chip |
SMSC (now Microchip) LAN91C111 MDIO Driver node1 |
||
on-chip |
Generic MII PHY1 |
||
Interrupt controller |
on-chip |
ARM Generic Interrupt Controller v31 |
|
MTD |
on-board |
Flash node1 |
|
Power management CPU operations |
on-board |
Power State Coordination Interface (PSCI) version 0.21 |
|
Serial controller |
on-chip |
||
Timer |
on-chip |
per-core ARM architected timer1 |
fvp_baser_aemv8r/fvp_aemv8r_aarch64/smp target
On-target memory for this board target: 128 MiB of RAM, 64 MiB of Flash.
Type |
Location |
Description |
Compatible |
|---|---|---|---|
CPU |
on-chip |
ARM Cortex-R82 CPU4 |
|
Clock control |
on-chip |
Generic fixed-rate clock provider1 |
|
Ethernet |
on-chip |
SMSC (now Microchip) LAN91C111 Ethernet controller1 |
|
on-chip |
SMSC (now Microchip) LAN91C111 MDIO Driver node1 |
||
on-chip |
Generic MII PHY1 |
||
Interrupt controller |
on-chip |
ARM Generic Interrupt Controller v31 |
|
MTD |
on-board |
Flash node1 |
|
Power management CPU operations |
on-board |
Power State Coordination Interface (PSCI) version 0.21 |
|
Serial controller |
on-chip |
||
Timer |
on-chip |
per-core ARM architected timer1 |
When FVP is launched with -a, --application FILE option, the kernel will be
loaded into DRAM region [0x0-0x7FFFFFFF]. For more information, please refer
to the official Armv8-R AEM FVP memory map document [4].
Devices
System Clock
This board configuration uses a system clock frequency of 100 MHz.
Serial Port
This board configuration uses a single serial communication channel with the UART0.
Programming and Debugging
Environment
First, set the ARMFVP_BIN_PATH environment variable before building.
Optionally, set ARMFVP_EXTRA_FLAGS to pass additional arguments to the FVP.
export ARMFVP_BIN_PATH=/path/to/fvp/directory
Programming
Use this configuration to build basic Zephyr applications and kernel tests in the Arm FVP emulated environment.
For AArch64 (64-bit) applications, use the Basic Synchronization sample:
# From the root of the zephyr repository
west build -b fvp_baser_aemv8r/fvp_aemv8r_aarch64 samples/synchronization
For AArch32 (32-bit) applications, use:
# From the root of the zephyr repository
west build -b fvp_baser_aemv8r/fvp_aemv8r_aarch32 samples/synchronization
This will build an image with the synchronization sample app.
Then you can run it with west build -t run.
Debugging
Refer to the detailed overview about Application Debugging.
You may use the instructions below to debug with Arm Development Studio [5].
Debugging with Arm DS
Install Arm DS
Please refer to the official Arm Development Studio Page [5] for details. Here
Version: 2020.b Build: 2020110909 is used in the following example.

Download Arm FVP BaseR AEMv8-R
Please refer to official FVP page [1] for download instructions. Here $FVP_D
is used to indicate which directory is FVP located.
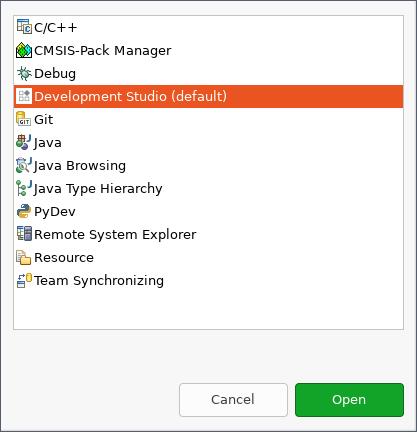
Use DS perspective
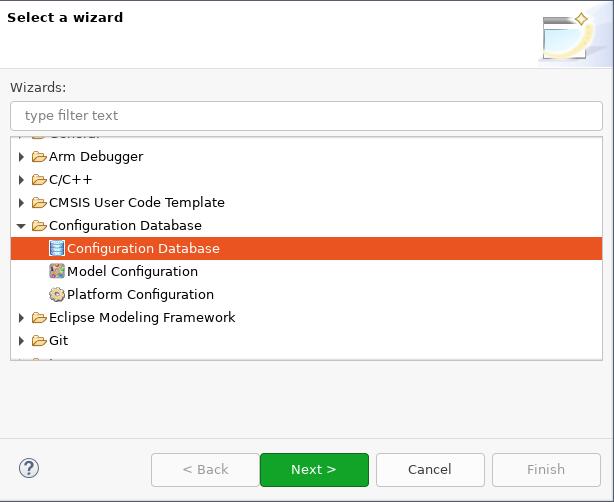
Create a new configuration database
Create a new configuration database by selecting :
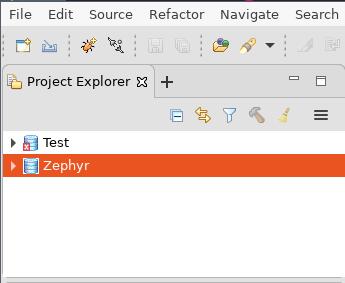
Choose a name for the database. Here Zephyr is used:
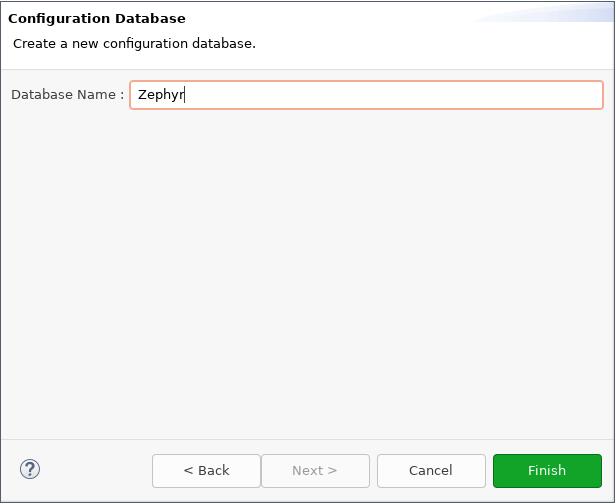
Click Finish and the new configuration database can be seen in Project Explorer:
Create a new model configuration
Right click Zephyr in Project Explorer, choose :
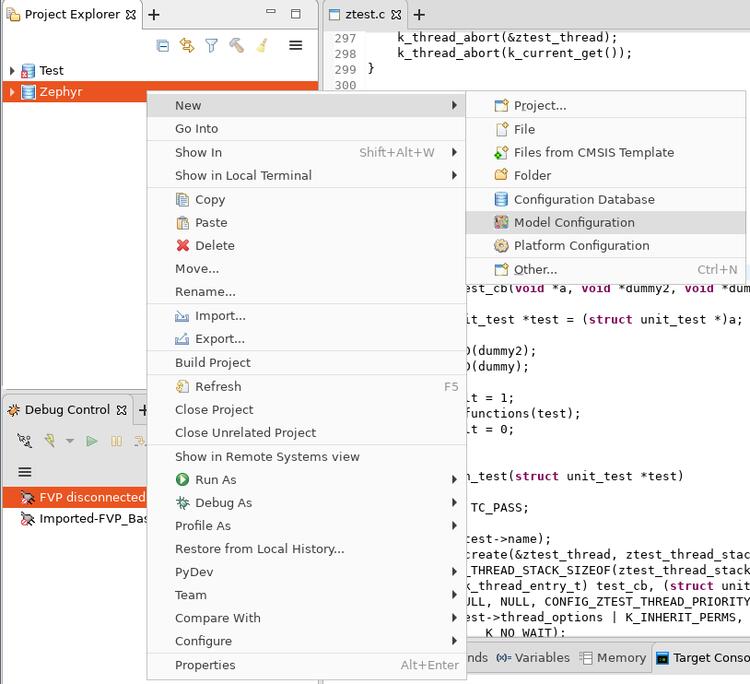
In the opened window:
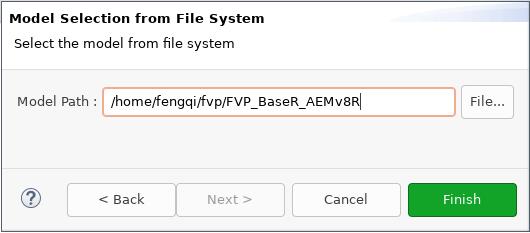
Choose Iris for Model Interface, then Next >.
Choose Launch and connect to specific model, then Next >.
Set Model Path to
$FVP_D/FVP_BaseR_AEMv8R, then Finish.
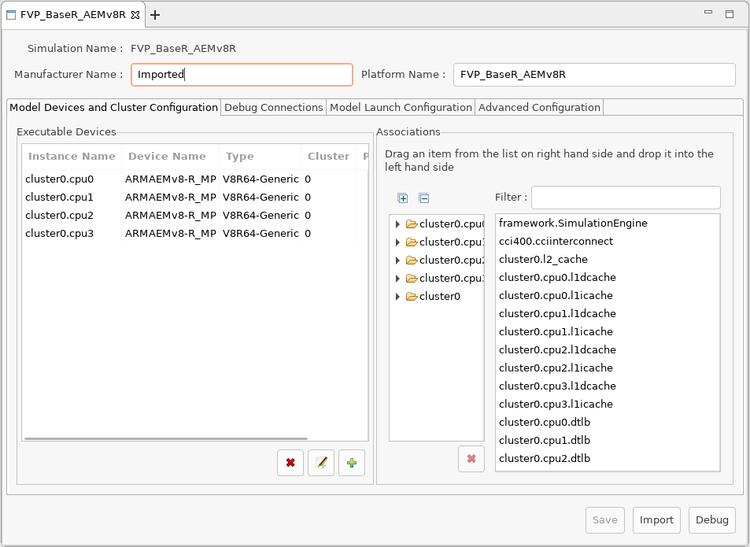
Then in FVP_BaseR_AEMv8R tab, change ARMAEMv8-R_ to V8R64-Generic, click Save and then click Import:
Create a new launch configuration
From Project Explorer, right click FVP_BaseR_AEMv8R and select :
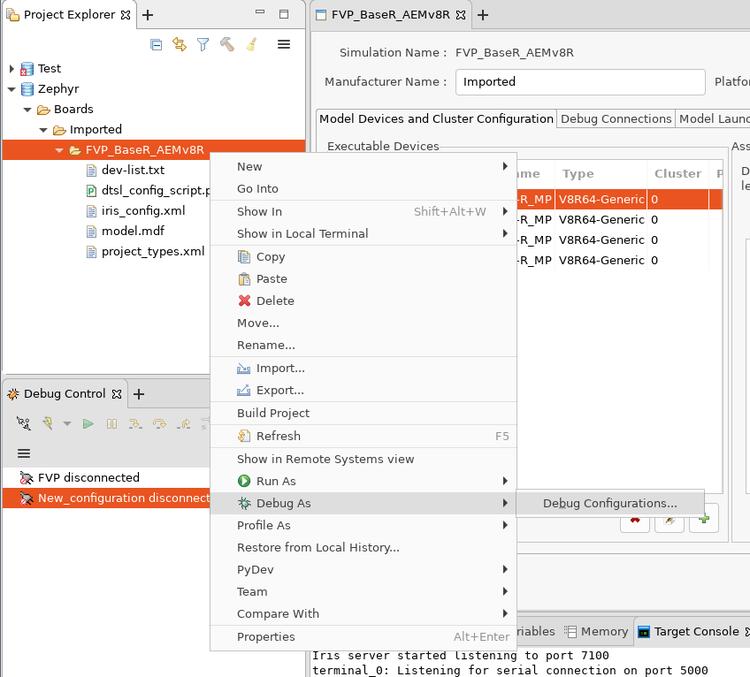
Select Generic Arm C/C++ Application and click New launch configuration button.
A new configuration named New_configuration will be created.
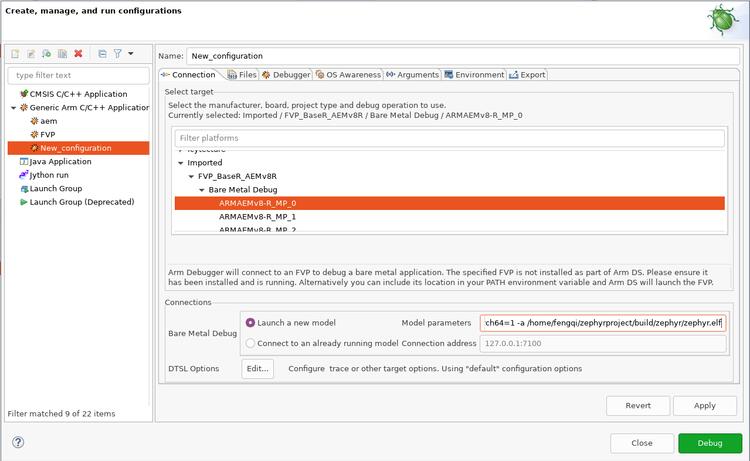
In Connection tab:
In Select target box, select Imported -> FVP_BaseR_AEMv8R -> Bare Metal Debug -> ARMAEMv8-R_MP_0
In Connections box, set Model parameters to:
-C bp.dram.enable_atomic_ops=1 -C bp.sram.enable_atomic_ops=1 -C bp.refcounter.non_arch_start_at_default=1 -C gic_distributor.GICD_CTLR-DS-1-means-secure-only=1 -C gic_distributor.has-two-security-states=0 -C bp.vis.disable_visualisation=1 -C cluster0.has_aarch64=1 -a /home/fengqi/zephyrproject/build/zephyr/zephyr.elf
These parameters are passed to FVP_BaseR_AEMv8R when launches. Run FVP_BaseR_AEMv8R –help to see all command line options. Run FVP_BaseR_AEMv8R –list-params to see all supported parameters. The file
zephyr.elfspecified by-ais the binary built from Zephyr.
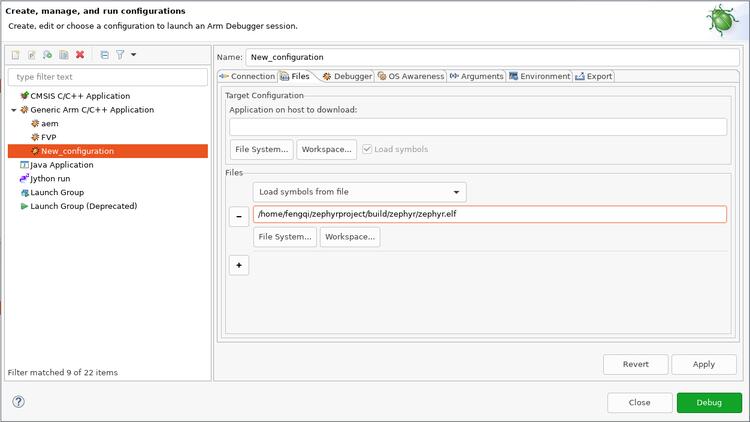
In Files tab:
In the Files group, set Load symbols from file to full path of zephyr.elf that you built.
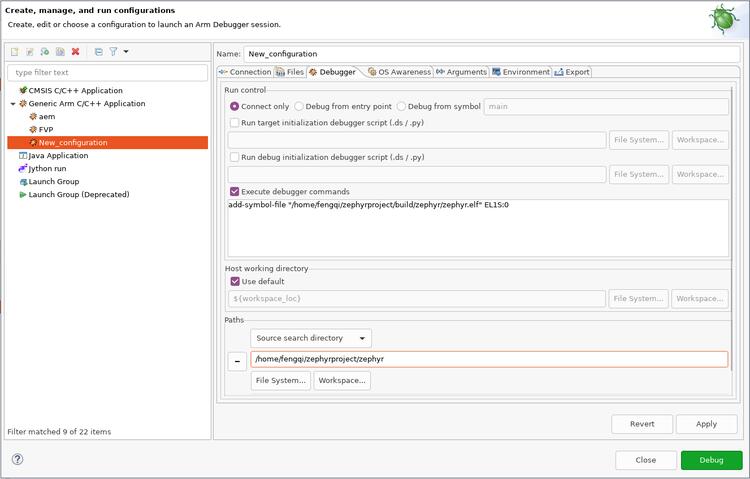
In Debugger tab:
In Run control box, check Execute debugger commands and insert:
add-symbol-file "/home/fengqi/zephyrproject/build/zephyr/zephyr.elf" EL1S:0
Replace /home/fengqi/zephyrproject/build/zephyr/zephyr.elf with your local path.
In Paths box, set Source search directory to the path to Zephyr source code.
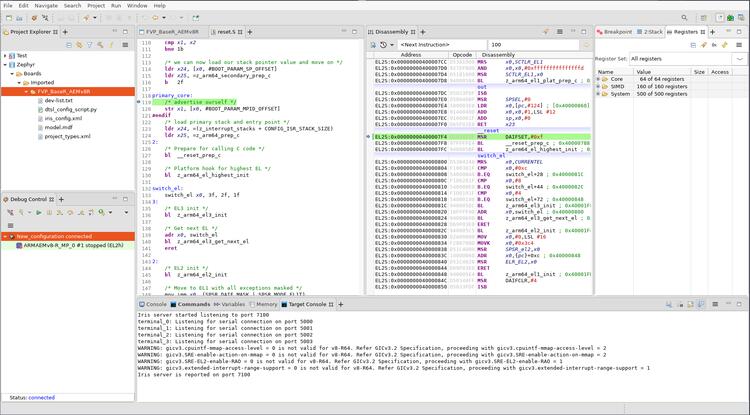
After all these changes are made, click Apply, then click Debug. DS will launch FVP_BaseR_AEMv8R and connect to it. You can see a new session is connected in Debug Control window.